Local Development with Docker Containers (beta).
NOTE 5.28.21: The following is an actively developed extension to NeuroCAAS that involves the use of docker containers to make analyses more portable. It describes the process of building an Immutable Analysis Environment locally with Docker containers before moving to AWS. For a stable workflow, check out the source repo here for a full developer guide.
Once you’ve successfully installed NeuroCAAS Contrib, it’s time to start developing. This is the process of taking some analysis code that you have written to process certain kinds of datasets, and making it usable through the NeuroCAAS platform.
Outline
This process has three steps:
(This guide) 1. Setting up an immutable analysis environment with docker. First, we need to install and setup your analysis code in a portable environment that can be run on your local machine, or a virtual machine hosted on the cloud. We will do this by means of a pre-configured docker container. We call this an immutable analysis environment because no analysis user will be able to change it, other than by submitting data to be analyzed by means of scripts that you write.
(Full Developer Guide) 2. Setting up job management. Next, we need to make sure that users will be able to analyze all the different data types that you intend to offer, and that they will be seeing the output and logging information you want to make available. We have streamlined a lot of job management to make this process easy for you.
(Ful Developer Guide) 3. Migrating to cloud resources. Finally, we want to make sure that the workflow you designed works on cloud resources (computing on cloud virtual machines, transferring data with cloud storage). This is where you might worry about configuring your analysis to work with a GPU, if that’s necessary, or parallelizing across a multi-core machine.
Before you start, it will be useful to have the following on hand:
the code you need to run you analysis in some easy to install format (i.e. a Github repo)
some small example dataset you can use to quickly iterate through analysis runs.
With your code and example dataset in hand, there are two ways to go through development workflow- through direct calls to the API (written in python) or the command line utility. We will describe both approaches in what follows.
Setting up an immutable analysis environment
First, we will set up a docker container where you can install your own analysis software, and save that to a new docker image (if these words don’t mean much to you, don’t worry).
Installation
If you are working with the CLI, first check that the cli is correctly set up. You can run
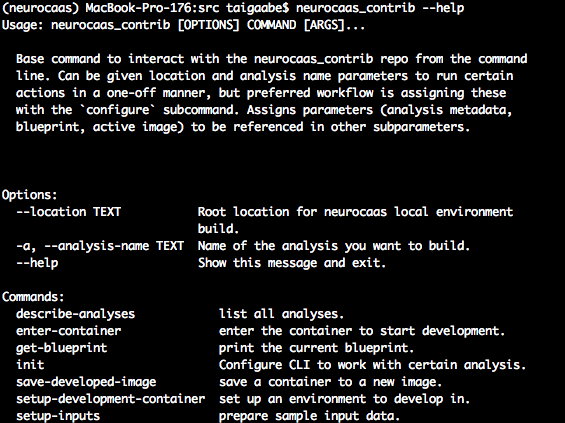
neurocaas_contrib --help
And you should see a help page detailing the different functionality available:
With a working CLI, you must first record the algorithm you are working on by running:
neurocaas_contrib init
This command writes a config file at ~/.neurocaas_contrib_config.json, and keeps track of your configuration parameters over the course of the session. You will be prompted to give the name of the analysis that you want to work on:

If it does not exist, you will be prompted to create a new one.

If you want to work on a different analysis, you can run the same command again.
You can check that initialization was successful by running:
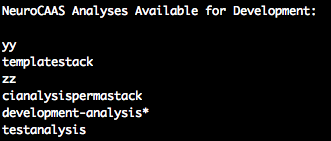
neurocaas_contrib describe-analyses
You will see a list of all the analyses available for development, as well as a star next to the one currently being worked on:
Once you have initialized your CLI, to work with a particular analysis, you want to start the process of setting up your software in a development container to create an immutable analysis environment (IAE). Your development container is an isolated environment with limited access to the file system available on you computer, so you will need to take several steps through the CLI to make the relevant data and software available. To make your sample data and configuration parameters available through the CLI, run the following command:
neurocaas_contrib setup-inputs -d path/to/sample/data.txt -c path/to/sample/configuration/params.json
By running this command, you will copy sample data and config files into a location initialized by running neurocaas_contrib init. You can pass multiple instances of either the -d or -c flags if you would like to set up multiple inputs or config files at a time. You can also omit either entry. You can skip this step, but you will not be able to access any other data files in your IAE if you do so.
Next, you will want to start installing and setting up your software into your IAE. This is done interactively from inside the IAE. Run the following:
neurocaas_contrib setup-development-container
Note that you might get an error message if you were previously using the cli:

You can fix this by resetting the container:
neurocaas_contrib reset-container
Once you have successfully run the setup step, you will then recieve a prompt that tells you how to enter your development container:

Running the given command will drop you directly into the container from the command line, where you can install the relevant software and perform setup. You should see something like this:

Note that the user name should change to neurocaasdev@containerid code, and that there is a directory called io-dir. This directory will become important in the next step. Once you are done installing and setting up your analysis, you can close the window by entering exit or ctrl-D.
You can then save your progress by running:
neurocaas_contrib save-developed-image
You will be prompted to enter a unique tag id to distinguish the work you did in the container (we recommend the short version of your current github commit id + the date, or something unique like that). You will be told if the image was saved successfully. You can also save containers other than the one most recently started using the setup-development-container command by passing the name of the container you want to save to the –container option (see help for more).
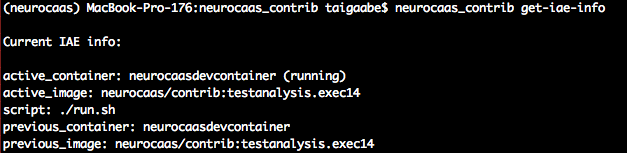
You can check the current container and image you are using by running:
neurocaas_contrib get-iae-info
You will then see information about the most recently saved image (which will also be the image that new containers are launched from) and the current running container, as well as the names of the previous containers and images. You should recognize the last part of the active_image name as the tag id that you enetered.
If you want to keep tweaking your container, run the entry command again:
neurocaas_contrib enter-container
Otherwise, if you want to delete you development container and start from the new image, first run neurocaas_contrib reset-container, and run the setup command:
neurocaas_contrib setup-development-container
The CLI will start a new container from the current active_image shown by the get-iae-info command. To start a container from a different image, you can pass the relevant docker image tag with the --image parameter.
Writing a workflow script
Once you are happy with your installation and setup, it’s time to write a script that will be applied to user data. If you’d like to see an example, take a look at neurocaas_contrib/mock/run_mock.sh You can do anything you would like in this script- run python scripts, change directories, make new files, but there are three rules you must follow:
Your script must be an executable (run
chmod +x [script name]) that can be run from the container’s home directory.You must assume the script will take two inputs (accessible at $1 and $2), providing the location of the data and configuration parameters that user submit.
As a final step you must copy all results you would like the user to see to the directory ~/io-dir/results.
Finally, there are a few tricks to be aware of, like making sure that conda environments activate correctly (use source, not conda). See [todo] for more.
Once you have determined the workflow script you would like, exit your container, and run the save script again. This time however, provide the path from the container’s home directory to the script option:
neurocaas_contrib save-developed-image --script "path/to/script/in/container.sh"
This will let the CLI know that the script located at this location is what we should run when users submit analysis requests.
You can then run test jobs from outside the container by calling:
neurocaas_contrib run-analysis -d "path/to/data" -c "path/to/config"
This will trigger the a new container to start up from your image, and run the command bash -c 'path/to/script/in/container.sh' path/to/data path/to/config inside the container.
Once you have completed this process, move to the full developer guide here.